
If you’ve ever looked at a great piece of anime artwork and wished it could actually move, you are going to love this.
Thanks to AI, turning a single anime image into a short animated video is easier than ever. And the best part is that you don’t need any animation background to do it.
Whether you’re trying to engage your audience on TikTok, YouTube Shorts, Instagram Reels, or X, short video clips are easily the best way to grab attention. PixAI image-to-video tool lets you run the whole process online in a few steps, and you don’t need expensive hardware or local installation to get started.
After spending a lot of time playing with the platform’s animation tools lately, I quickly realized that the final quality depends just as much on your text prompts and settings as your starting artwork.
In this guide, I’m going to show you exactly how to turn your anime images into videos with PixAI, along with a few pro-tips to make your animations look smooth, natural, and ready to post.
Step-by-Step: How to Turn Anime Images into Videos with PixAI
Here is everything you need to set up before creating your first clip:
- A PixAI account
- A source anime image: The specific anime artwork you wish to animate
- Enough credits: Log in to claim 10,000 free daily credits.
Now that you’re set up, all that’s left is to figure out exactly what kind of scene you want to bring to life. Just keep in mind that starting with a crisp, high-resolution image makes a big difference in the final look.
Also, PixAI animations flow a lot more naturally when you use artwork showing the character’s full body and face, instead of tight, heavily cropped portraits that don’t give the AI much room to work with.
Step 1: Open PixAI’s Image-to-Video Generator
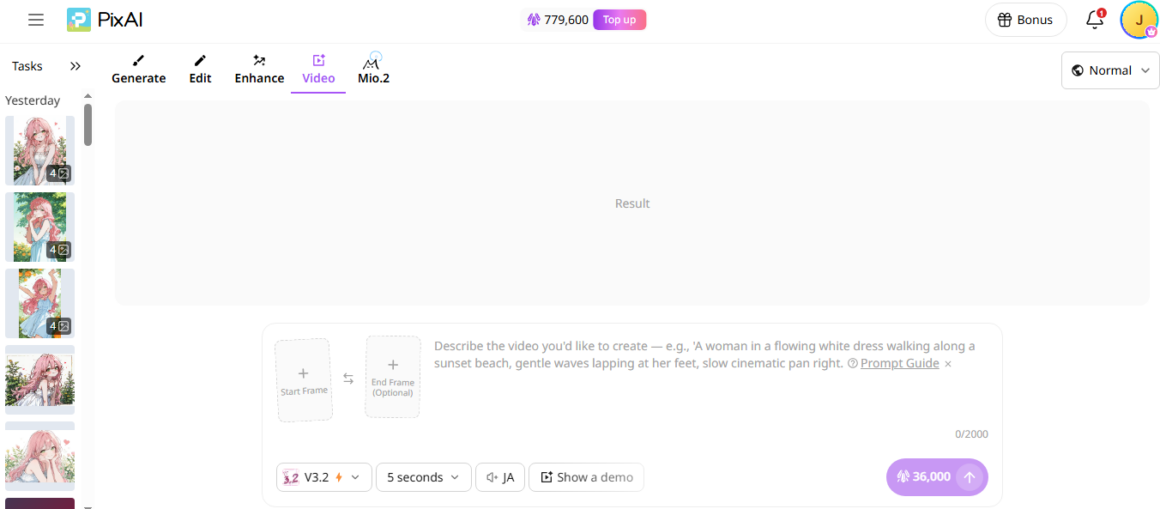
Log in to PixAI, open the generation panel, and click the Video tab to get started. The interface is straightforward, with your media, prompts, and settings handled at the bottom.
Step 2: Upload Your Anime Image
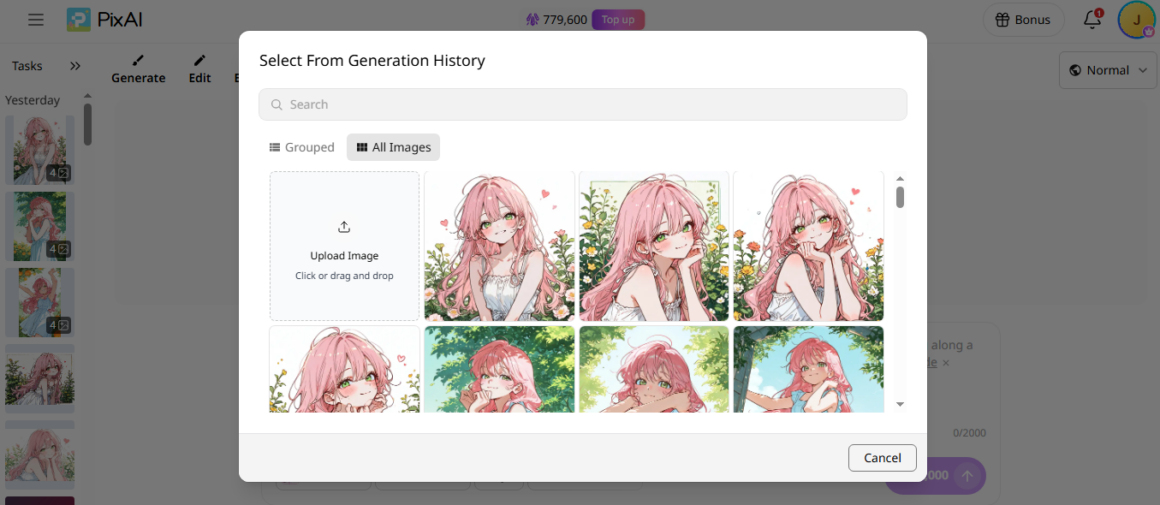
Click “Start Frame” and then “Upload Image” to add your source illustration. If you’re using an image created with PixAI, you can select it from your task history.
Most PixAI models, starting with V3.0 lite, offer a start frame and an end frame. That means you can upload a starting image and an end image, and the video will be generated to transition from the first frame to the last one.
Once again, the starting frame completely dictates how well the AI’s motion physics will behave. If your favorite image is a little blurry, it is definitely worth running it through PixAI’s built-in Upscaler first to give the video generator something cleaner to work with.
Step 3: Describe How You Want the Scene to Play Out
Now, type your action instructions into the prompt field. For a complete scene, make sure to cover physical character movement, changes in facial expressions, camera tracking angles, and background environmental motion.
Here is an example of a good prompt that you can use:
“Anime girl smiling gently as cherry blossoms fall around her while the camera slowly zooms in”
Keep it simple. You will get way better results focusing on tiny, natural movements rather than trying to force dramatic fight scenes or rapid camera angles. You can also check out PixAI’s video usage guide for a deeper look at how to write the best prompt.
Step 4: Choose an Animation Model
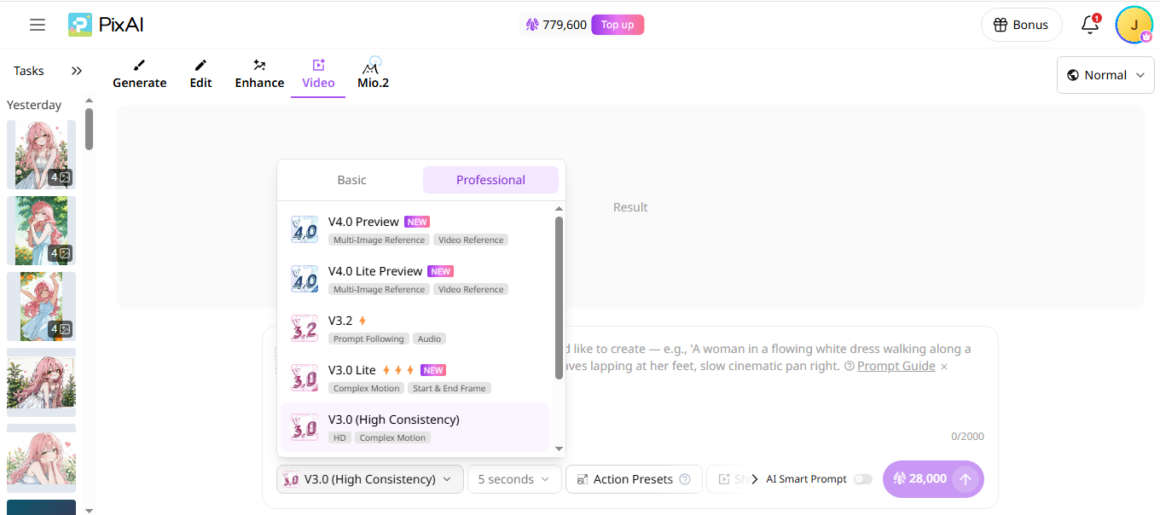
PixAI currently offers seven different options, and they don’t all behave the same way. For example, if you want to push past the standard 10-second limit, you’ll need to go with V4.0 Preview or V4.0 Lite. The older models just can’t do it.
The newer models also offer multi-reference support, allowing your characters to retain their unique facial features and outfits, making them instantly recognizable.
Step 5: Adjust the Video Settings
First, check out the panel on the right side of your screen to set your generation mode:
- Normal Mode: This is a quick, credit-efficient option, but keep in mind that it strictly enforces SFW filters and will block any borderline or mature artwork.
- Enhanced Mode: This gives the rendering engine an extra push, offering better overall depth and smoother motion tracking.
The rest of your tuning tools sit entirely along the bottom of the workspace. Look down at the bottom bar to choose your video length or switch from First & Last Frame to Multi-Reference if you’re using the V4.0 models.
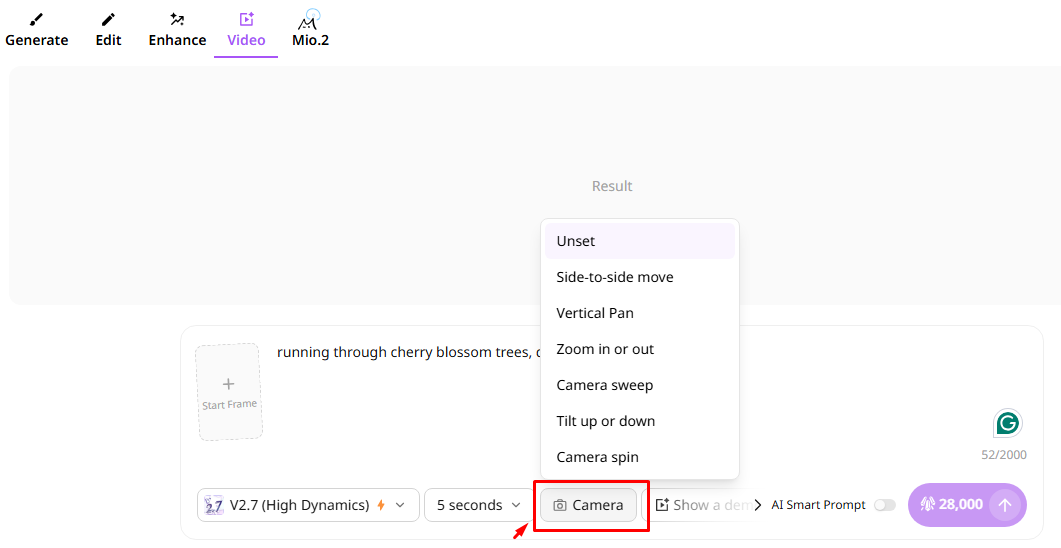
If you want access to cinematic camera movements, you will need to choose V2.7 (High Dynamics), which is the specific model that gives you a camera angles menu. PixAI V3.0 (High Consistency) is another model that comes with unique features. Its action presets allow you to animate without a text prompt.
Step 6: Generate and Preview Your Video
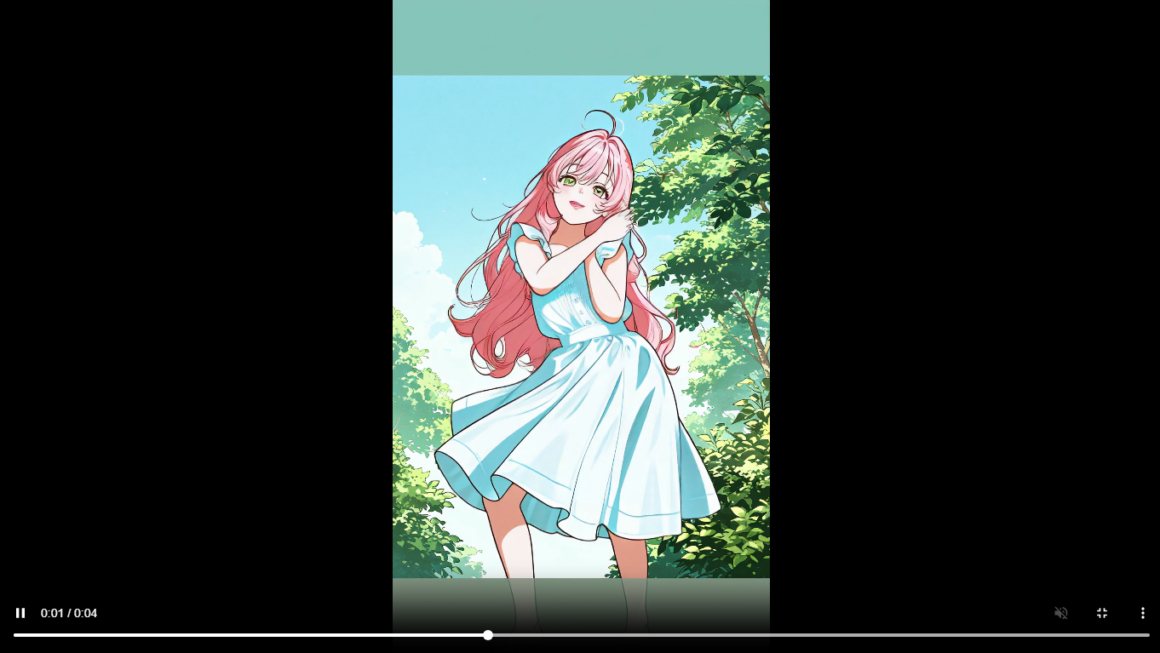
Happy with your prompt and settings? Go ahead and click generate. Once the rendering wraps up, give it a close watch. Keep your eyes peeled for any weird facial expressions, hand movements, and camera angles.
If something looks a bit off, don’t panic. You usually don’t need to overhaul all your settings. Nine times out of ten, a quick, minor tweak to your text prompt will fix the issue.
Common Issues and How to Fix Them
|
Problem |
Solution |
|
Motion looks unnatural |
Reduce motion intensity and simplify the action |
|
Character changes appearance |
Use a clearer prompt and reduce complex movement |
|
Video is blurry |
Start with a higher-resolution source image |
|
Animation feels too static |
Add subtle camera movement or facial expressions |
|
Generation fails |
Retry or simplify the prompt |
Final Thoughts
PixAI’s Image-to-Video generator makes it quite easy to create short anime videos from an illustration. All you need to do is upload your art, describe the movement you want, adjust a few settings, and watch the magic happen.
The biggest difference between an average result and a great one comes down to your prompts. Skip the chaotic action at first and start small with gentle movements. If need be, run a few different versions until the animation matches what you’re aiming for.
Once you get the hang of it, you’ll have a fast, repeatable process for churning out awesome videos for TikTok, Instagram, and YouTube Shorts!